

The rapid rise of LED display technology has transformed how businesses communicate, advertise, and present information. From corporate conference halls to retail showrooms and educational institutions, LED video walls deliver immersive visuals and high brightness that traditional screens simply cannot match. Yet despite their growing popularity, installing an LED wall is far from a plug-and-play task. It requires careful planning, advanced engineering understanding, electrical coordination, and a structured workflow that minimizes risks.
In most modern settings, organizations expect their installations to follow professional LED wall installation standards to ensure reliability, safety, and long-term performance. Whether the project involves a small lobby display or a massive commercial billboard, success depends on managing the complex details that go into mounting, wiring, calibrating, and protecting the system. This guide provides a full overview of these steps, blending practical on-site requirements with operational wisdom collected from countless real-world installations.

Understanding Pre-Installation Planning
Before the first bracket is mounted or the first module is connected, a thorough planning stage must take place. This planning determines the long-term stability and performance of the LED wall.
- Site Inspection and Structural Evaluation
Every LED wall project begins with a physical site inspection. Installers must evaluate wall materials, load-bearing capacity, available mounting space, and environmental conditions such as direct sunlight, humidity, airflow, and ambient temperature. If the installation is part of a retail environment where managers are also exploring 10 Creative Ways to Use LED Poster Displays in Your Store, planners often need to consider customer traffic flow and visual angles to ensure maximum impact.
- Electrical Infrastructure Requirements
LED walls consume significant power. Before installation, electricians must calculate the total electrical load of the system and ensure separate circuits are available. Grounding is essential to eliminate electrical noise and prevent damage to LED drivers and receiving cards.
Power distribution planning is also a critical part of professional LED wall installation, as undervoltage or inconsistent current may create visible inconsistencies across modules.
Step 1: Preparing the Mounting Surface
Mounting preparation is arguably the most essential stage of the entire installation process. The integrity of the wall determines the alignment and stability of the full display.
Surface Leveling and Reinforcement
Even the smallest surface irregularity can lead to misalignment between LED modules. Installers use laser guides to evaluate flatness before deciding whether reinforcement panels are required.
When working with schools or campuses that are simultaneously upgrading audiovisual systems, planners sometimes incorporate LED walls alongside other educational tools, such as an LED Display for Digital Classrooms, making proper alignment even more critical for viewing clarity.
Measurement and Planning
Every LED module has a precise dimension, and installers must use precision mounting techniques to ensure the mounting frame matches those measurements exactly. A deviation of even one millimeter can create visible seams.
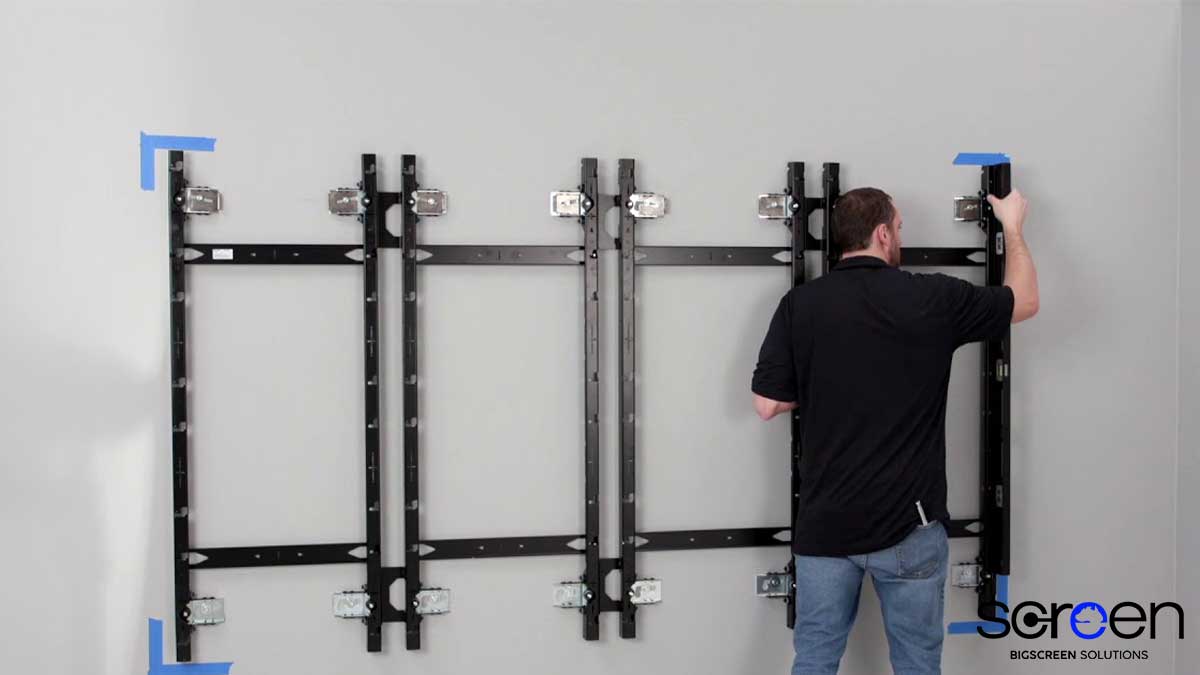
Step 2: Installing the Mounting Frame
Once the surface is prepared, the next step is installing the steel or aluminum mounting frame that supports the LED modules.
Selecting the Correct Frame Material
Indoor installations generally use lightweight aluminum frames, while outdoor LED walls often require steel frames engineered to withstand wind, moisture, and temperature changes.
Ensuring Structural Safety
Structural integrity is essential. Bolts, expansion screws, and anchor points must be tested. Frames designed for professional LED wall installation should support the weight of the system without flexing, even under long-term heat cycles.
Step 3: Wiring and Power Distribution
Wiring is one of the most complex components in LED wall installation because it involves coordinating power, data, and signal routing throughout the entire system.
Power Cabling
Each LED cabinet requires its own power line. Installers group cabinets into power loops to avoid overload. Surge protectors are mandatory, especially in regions with unstable electrical grids.
This becomes even more relevant when investors evaluate budgets and start asking, How Much Does Digital Signage Cost? since power distribution systems often make up a significant portion of the total installation expense.
Data Cabling
Data cables link each LED cabinet so that control signals can flow from the processor to the display. Cabling must follow recommended lengths to avoid latency or flickering issues.
Cable Management
Neat cable management prevents overheating, simplifies future maintenance, and reduces signal interference. Installers secure cables to the mounting frame in organized channels to prevent tangling.
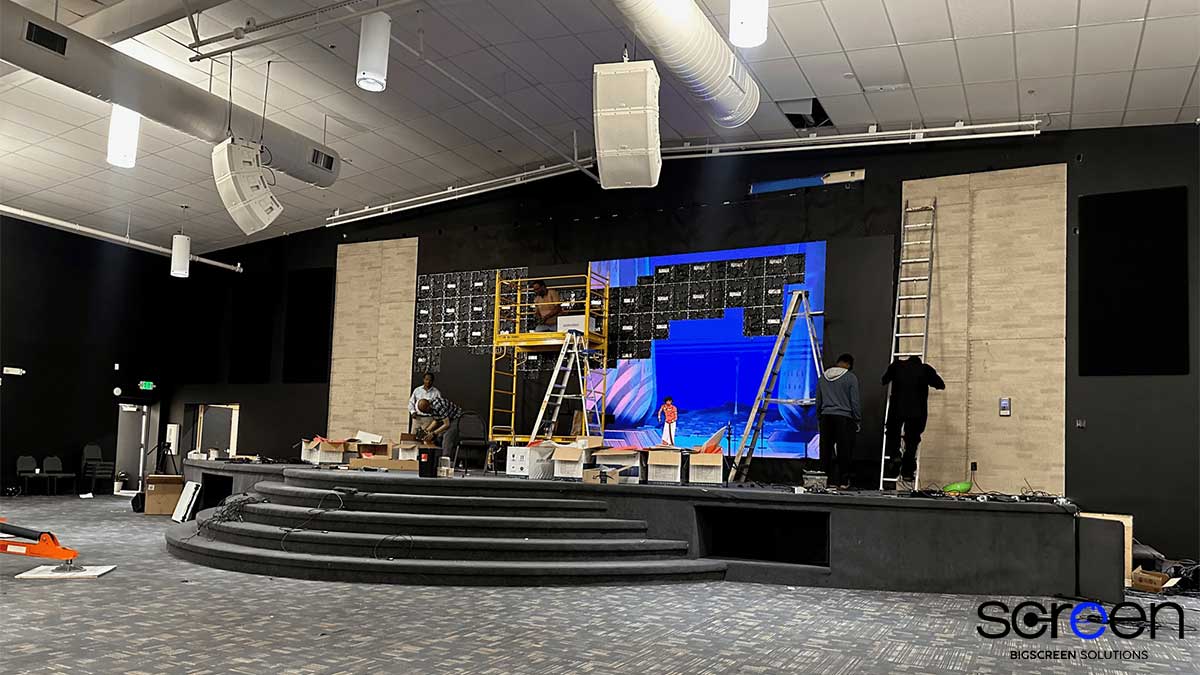
Step 4: Installing LED Cabinets and Panels
With the frame and wiring ready, installers begin attaching LED cabinets.
Cabinet Mounting
Each cabinet must attach firmly and precisely to the frame. Misaligned cabinets cause uneven seams and distort the overall appearance of the video wall.
For corporate studios or entertainment venues using modular systems like LED Video Wall Panels, technicians often pre-test cabinets before installation to quickly identify defective components.

Module Magnetism and Locking
Most modern LED modules secure magnetically, allowing quick attachment and easy maintenance. Installers check every panel to ensure magnets are secure and mechanical locks are engaged.
Front vs. Rear Access Considerations
Depending on the environment, LED walls may be designed for front access (modules open from the front) or rear access (a service corridor behind the wall). Installers must choose the appropriate system:
- Front access: ideal for tight spaces
- Rear access: best for large installations needing complex maintenance
Step 5: Connecting Control Systems
Once cabinets and modules are physically mounted, technicians integrate the LED wall with its control systems.
Processor Configuration
The video processor maps the LED modules and translates content into display-ready output. Proper mapping ensures that every pixel responds correctly.
Calibration and Color Adjustment
Brightness, grayscale, and color uniformity must be calibrated. This is a central component of professional LED wall installation, particularly in control rooms and advertising environments.
Pixel Correction and Seam Adjustment
Installers correct dead pixels, color shade variations, and micro-seams. Calibration cameras may be used to improve pixel consistency.
Step 6: Testing and Optimization
Before final delivery, a rigorous testing phase ensures the wall performs correctly.
Running Test Patterns
Technicians use test patterns to check for:
- Color uniformity
- Module synchronization
- Image distortion
- Flickering or refresh issues
Heat and Load Testing
LED walls generate heat. Installers measure temperature after extended operation to ensure ventilation is adequate. Outdoor walls require additional testing to ensure weatherproofing.
Safety Inspections
Technicians inspect all wiring, anchoring, and system behavior. Heavy installations must meet building safety codes.
In retail environments or museum spaces, simple signage tools like an LED Sign may also be installed alongside the main video wall, requiring coordinated safety checks.
Step 7: Content Configuration and System Training
Once the display is fully functional, operators must learn how to use, maintain, and update the content system.
Content Scaling and Formatting
Content must be designed in resolutions matching the LED wall’s pixel dimensions. Incorrect scaling can distort images or reduce clarity.
User Training
Operators learn:
- Basic troubleshooting
- Content uploading
- Power cycles and startup sequences
- Routine cleaning and maintenance
Some organizations add additional tools such as an LED Writing Board for interactive presentations, requiring the operator to manage multiple display systems together.

Precautions During and After Installation
Installation does not end once the wall powers on. Long-term performance depends on following key precautions.
- Avoiding Environmental Hazards
Humidity, dust, and direct sunlight can reduce LED lifespan. Outdoor walls must use sealed cabinets and waterproof power supplies.
- Routine Maintenance
Regular cleaning ensures dust does not accumulate within modules. Technicians should perform quarterly inspections to ensure no panels, screws, or cables have loosened.
- Proper Ventilation and Heat Control
LED walls require airflow behind the modules. Poor ventilation leads to premature component failure and image deterioration.
- Electrical Stability
Stable voltage is essential. Backup power and surge protection prevent unexpected shutdowns or damage.
Common Mistakes to Avoid
Even high-budget projects fail when common mistakes occur during installation. Many companies are aware of warnings highlighted in publications like 5 Mistakes to Avoid When Investing in LED Signage, and experienced installers take these lessons seriously.

Typical Mistakes Include:
- Choosing the wrong pixel pitch for viewing distance
- Improper frame alignment
- Overloading power circuits
- Ignoring heat management
- Rushing calibration
- Using untrained labor
Each of these mistakes can cause permanent visual defects or reduce the lifespan of the wall.
Using LED Walls in Modern Applications
LED video walls are used in nearly every sector. Schools integrate them into interactive teaching environments along with systems like LED Display for Digital Classrooms, while retail stores use LED walls to create immersive shopping experiences. Corporations rely on them for branding, product launches, and internal communication.
Innovative designers sometimes combine LED walls with creative features, including the concepts showcased in 10 Creative Ways to Use LED Poster Displays in Your Store, blending traditional posters with large-scale video content.
Conclusion
Installing an LED video wall requires technical understanding, careful planning, and adherence to high-precision standards. When following a structured process built around professional LED wall installation, organizations ensure their investment delivers vibrant visuals, stability, and long-term durability.
From structural preparation and electrical planning to module calibration and final testing, every stage plays a crucial role. With proper precautions, skilled technicians, and a well-designed maintenance plan, LED video walls can operate flawlessly for years while elevating the visual impact of any environment.